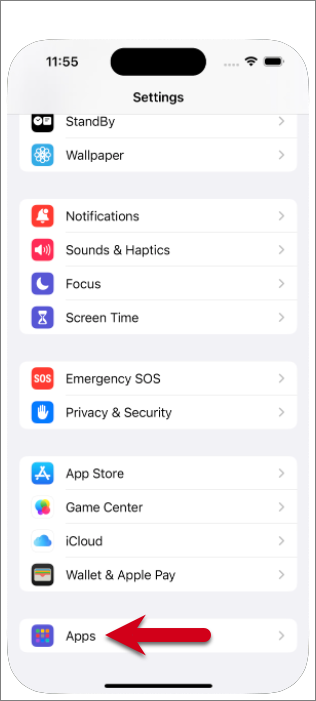
Step 1.
Go to Settings > Apps
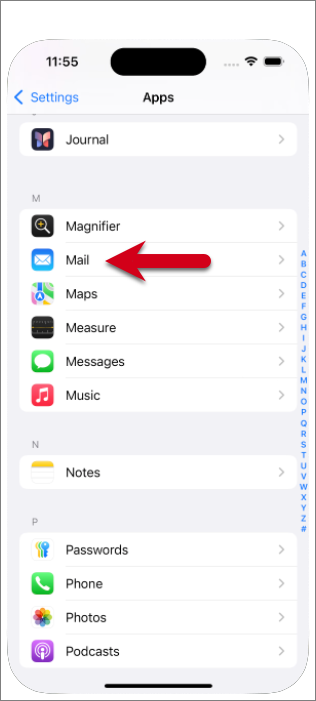
Step 2.
Select Mail
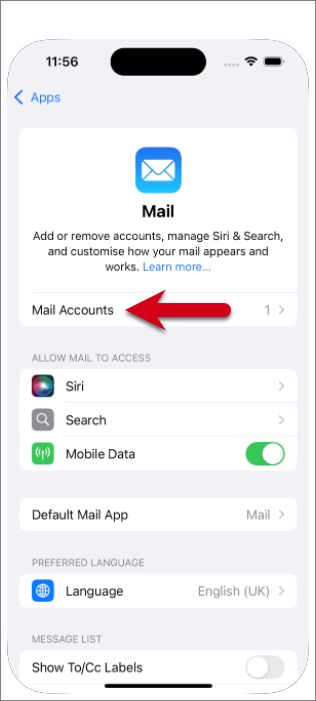
Step 3.
Select Mail Accounts.
Step 4.
Select Add Account.
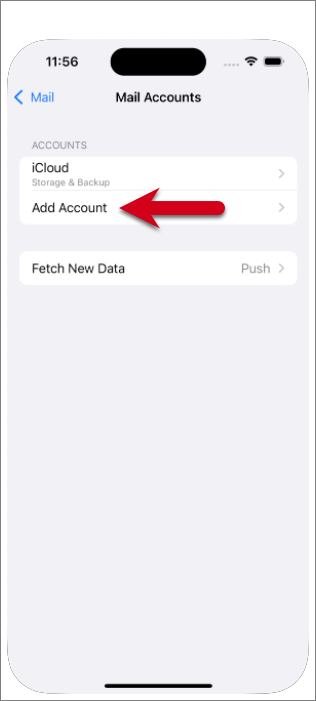
Step 5.
Select Other as the account type.
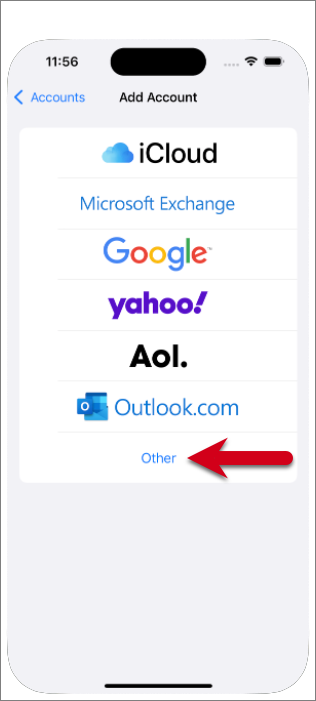
Step 6.
Select Add Mail Account.
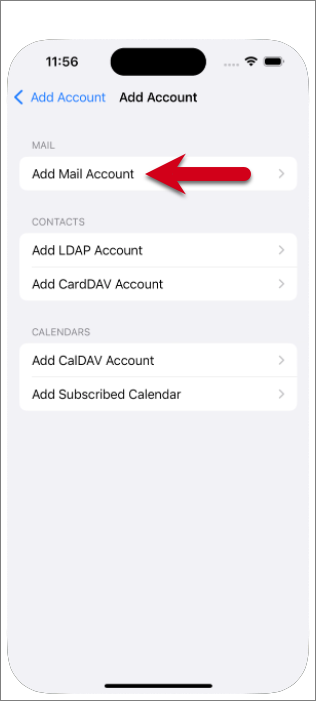
Step 7.
Enter the account details for the email you want to add:
- Name: the display name, which is the name your recipients will see when you’re sending an email to them.
- Email: the email address you want to add.
- Password: the password you use when you’re logging in to your Webmail.
- Description: a name for the account on your device.
Tap Next to continue.
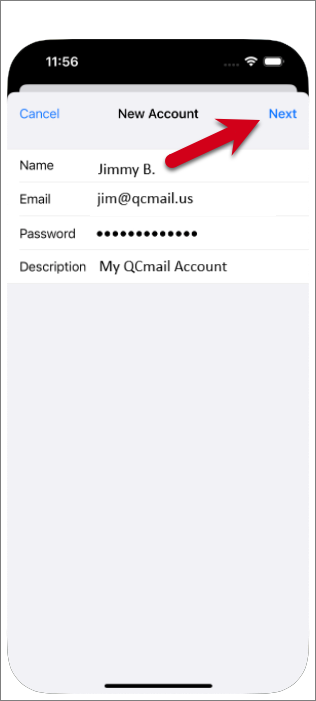
Step 8.
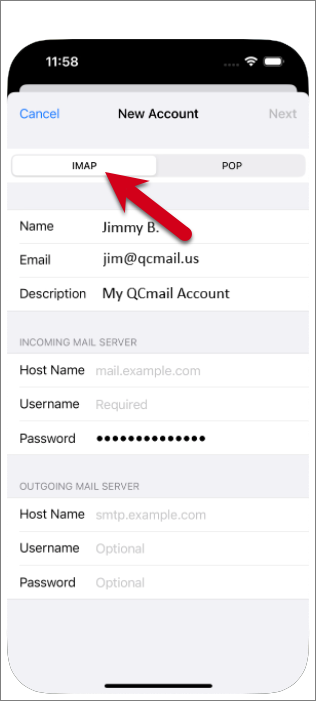
Select IMAP
If not already selected, choose IMAP as the account type.
Step 9.
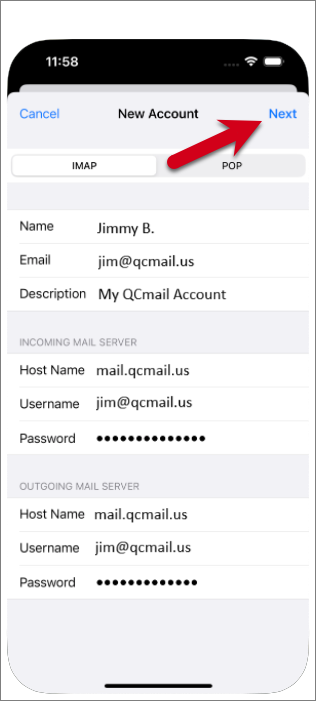
Enter your server settings
Enter the following settings:
Incoming mail server:
- Server/Host Name: imap.one.com
- Username: your email address
- Password: the one you use for Webmail
Outgoing mail server:
- Server/Host Name: send.one.com
- Username: your email address
- Password: the one you use for Webmail
Select Next in the upper-right corner to continue.
Note: Even though it says optional, the username and password must also be entered in Outgoing mail server settings.
Step 10
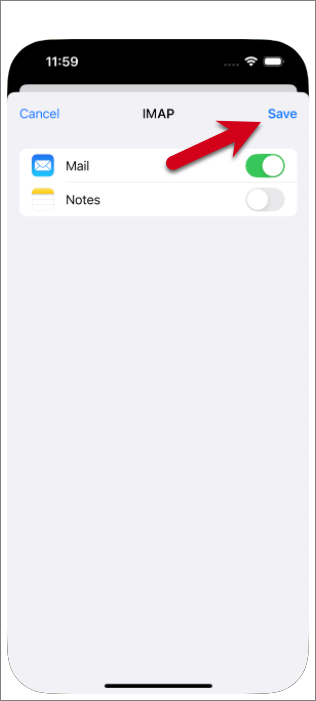
Select Save
Make sure syncing of Notes is disabled and the slider is grey. Select Save to continue.
Step 11.
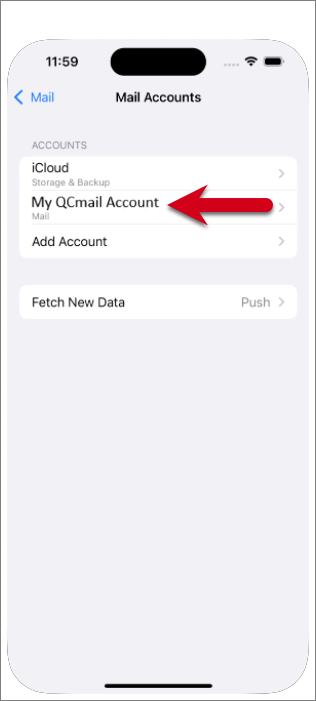
Select the account you just added. You can recognize it by the description.
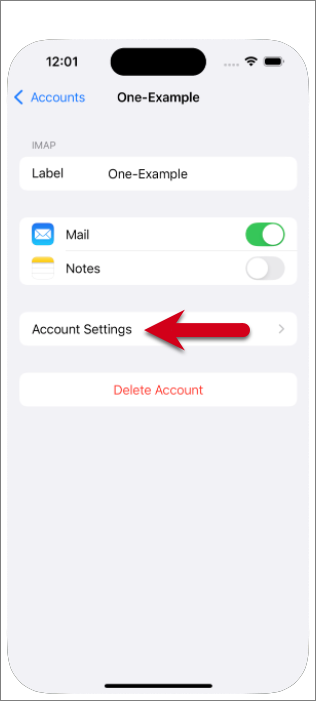
Step 12.
Select Account Settings.
Step 13.
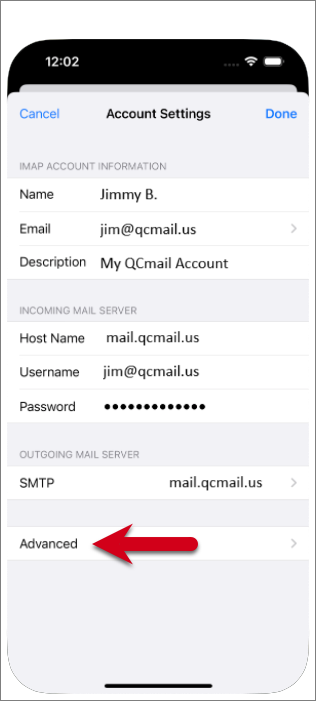
Select Advanced, at the bottom of your screen.
Step 14.
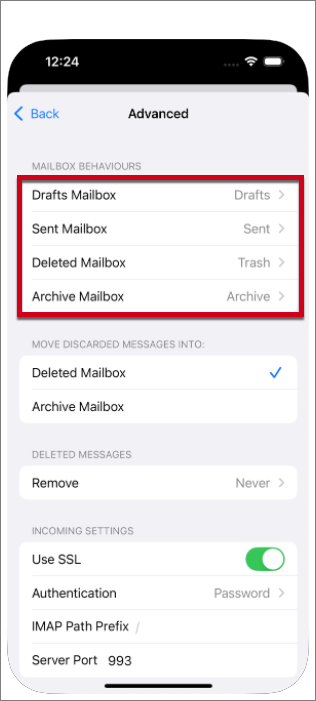
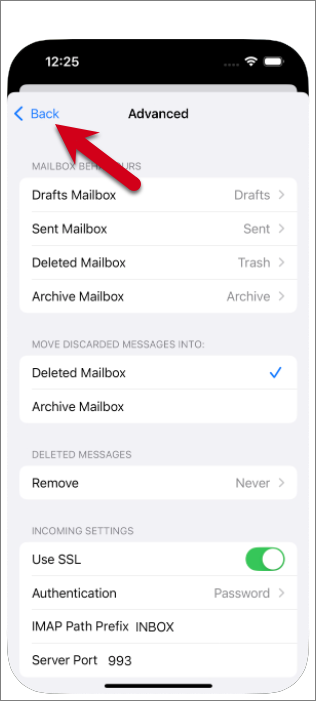
Check Mailbox behaviours
Check if the Mailbox behaviours are set correctly. These settings determine where your emails are saved.
You need to select the following folders on the server:
- Drafts Mailbox: Drafts
- Sent Mailbox: Sent
- Deleted Mailbox: Trash
- Archive Mailbox: Archive
Make sure the Mailbox behaviours are set correctly. These settings determine the location where your emails are saved.
Select the mailbox and select the correct folder on the server if no folder is selected. The name of the folder is in English.
Note: If you don’t see the folder, log in to Webmail, place an email in the unavailable folder, and then try again.
Step 15.
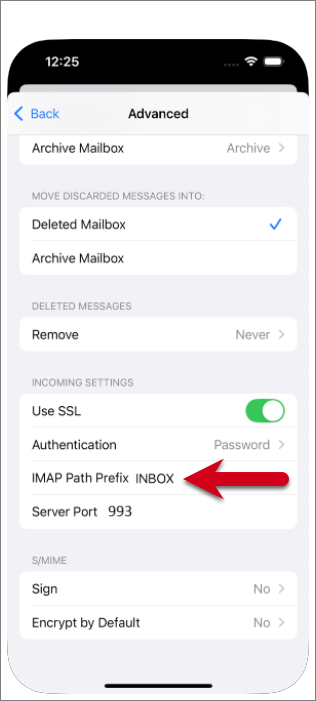
Enter IMAP Path Prefix
Scroll down to the bottom of the screen and enter INBOX as IMAP Path Prefix, all in capitals.
Step 16.
Select the Back button (arrow) in the upper left corner, then tap Done to save.
Step 17.
Done!
Congratulations! Your account is now set up correctly on your iPhone.